
Every week, our factory receives emails that start the same way: “I need custom canvas tote bags. What’s the price?”
That’s a fair question, but it’s also unanswerable — at least not without another five emails of back-and-forth. A canvas tote bag can cost anywhere from 0.80to6.00 per unit at wholesale volumes, and the difference between those two numbers is entirely in the customization choices.
After years on the production floor, I’ve learned that the clients with the smoothest orders are not the ones who order the most bags. They’re the ones who understand the customization process — not as a creative exercise, but as a series of manufacturing decisions that each have cost, timeline, and quality implications.
This guide walks through every step of customizing a canvas tote bag, from the first inquiry to the pallet leaving our loading dock. It’s written from behind the cutting table, not the marketing department.
What “Customization” Actually Means on the Factory Floor
When a buyer says “custom canvas tote bag,” they usually mean one of two things — and factories treat them very differently.
OEM customization means you bring a design — a sketch, a reference bag, a tech pack — and the factory produces it to your specification. You decide the dimensions, fabric, handles, print, label, and packaging. The factory’s job is to execute. This is the most common arrangement for established brands and importers who know exactly what they want.
ODM customization means the factory proposes designs based on their existing patterns and material inventory, and you select and modify. The factory might show you 20 handle options, 10 fabric swatches, and 5 bag silhouettes. You mix and match. This is faster and cheaper because it leverages the factory’s existing supply chain, but it gives you less creative freedom. We recommend this path for first-time buyers who are still figuring out their product.
Most orders fall somewhere in between. A client might start with our standard 15″ × 14″ tote body (ODM), specify their own fabric weight and handle length (moving toward OEM), and add a custom-printed label (fully OEM). The key is knowing which parts of the bag you want to control and which you’re happy to delegate.
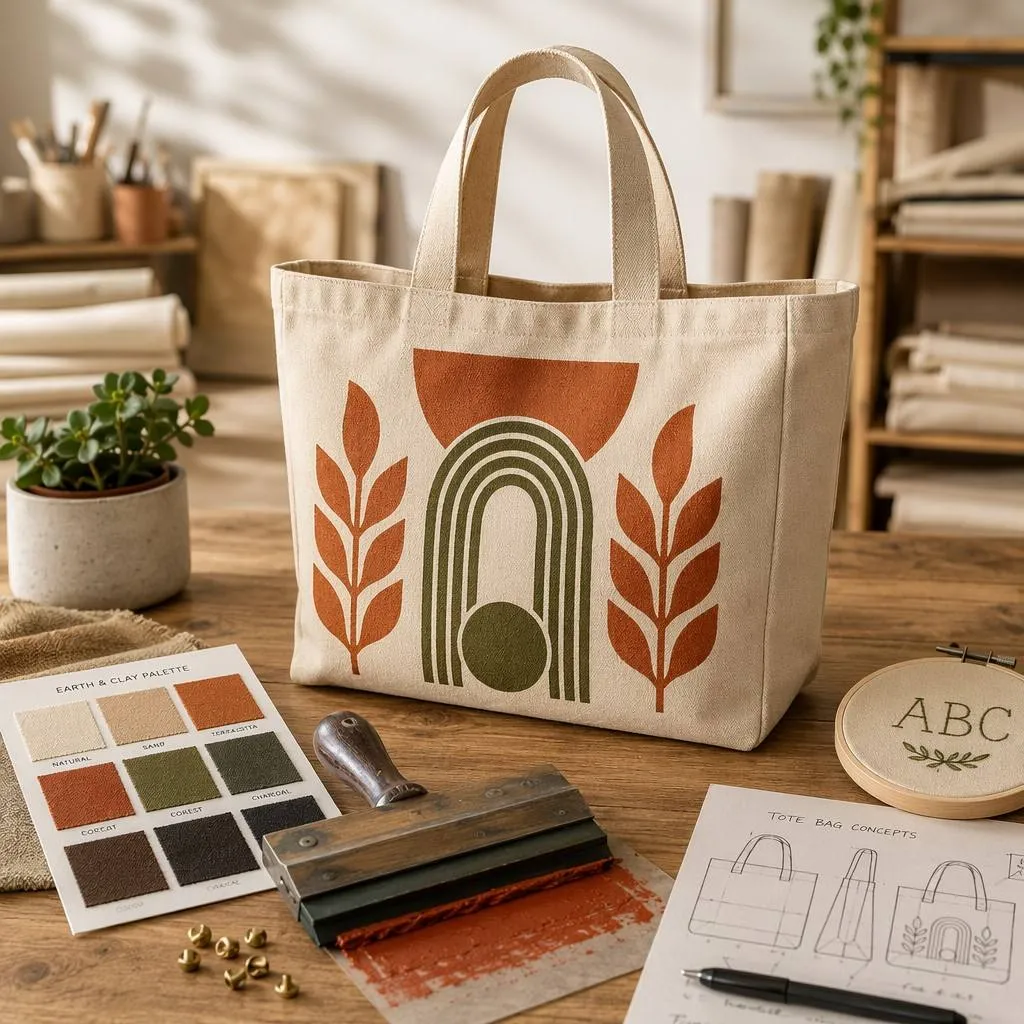
Step 1: Define Your Bag’s Core Dimensions
Before we talk about fabric or printing, we need to lock down the bag’s physical footprint. This seems obvious, but we see more samples rejected for size issues than for any other reason.
The standard canvas tote bag dimensions we run most often are:
Three things to keep in mind when setting dimensions:
Gusset depth changes the bag’s character more than you’d expect. A 4-inch gusset lets a standard tote stand upright when loaded. A 2-inch gusset makes it a flat shopper that hangs against the body. We’ve had clients change nothing but the gusset and feel like they received a completely different product.
Handle drop length is critical and often overlooked. The handle drop — the distance from the top of the bag to the top of the handle arc — determines whether the bag can be carried on the shoulder or only by hand. We recommend 9–10 inches for hand-carry totes and 11–12 inches for shoulder-carry. Anything shorter than 9 inches forces hand-carry only.
Fabric weight interacts with dimensions. A 10 oz canvas bag at 18″ × 15″ will feel flimsier than the same 10 oz canvas at 12″ × 13″, simply because the larger panel has more surface area to flex. If you’re going big, consider going up one weight tier.
Step 2: Choose Your Canvas Fabric
This is where most of our client conversations spend the most time. Here’s the factory-level breakdown:
Canvas weight is your first decision. For tote bags, the range that runs through our production floor looks like this:
- 6–8 oz: Lightweight promotional totes. Runs fast on the sewing line, low material cost, but limited to simple unlined designs. We don’t recommend this for bags intended to carry more than 5 pounds.
- 10 oz: Our most-run weight. Substantial enough for daily use, smooth enough for clean screen printing, and still folds compact for shipping. If a client says “I don’t know what weight I need,” we sample in 10 oz first.
- 12 oz: Premium retail tote weight. The fabric holds sharp corners, resists creasing, and supports heavier loads without sagging. Costs about 15% more in material than 10 oz.
- 14–16 oz: Specialist territory. We run these for tool bags, luxury fashion totes, and heavy-duty utility applications. The sewing line slows down because the fabric is harder to feed through the machines.
Fiber composition is your second decision. We stock:
- 100% cotton canvas (most common, best print surface, natural feel, wrinkles)
- Cotton-polyester blend (65/35 or 80/20, less wrinkling, lower cost, slightly slicker print surface)
- Organic cotton canvas (GOTS certified, 20–40% cost premium, requires separate production batching to maintain certification chain)
- Recycled cotton canvas (post-industrial waste, typically blended with virgin cotton for strength)
If you’re unsure, 10 oz 100% cotton canvas is the safest starting point. It’s what we recommend to nine out of ten new clients, and it’s what we keep in stock year-round.
Step 3: Select Your Handle Type
Handles seem simple, but they’re the part of the bag that takes the most stress. We see more warranty issues from handle failure than from any other component.
Handle length is just as important as handle type. Our standard drops:
- Hand-carry: 9–10″ drop (short handles, bag carried in hand or crook of elbow)
- Shoulder-carry: 11–13″ drop (fits over the shoulder of most wearers)
- Crossbody: Not recommended for standard totes — the arc geometry doesn’t work without a gusseted body design
One production insight: self-fabric handles on heavy canvas (12 oz+) can be bulky at the seams. If you want self-fabric handles on a 12 oz or heavier bag, we recommend stepping down to a slightly thinner fabric for the handle material — 10 oz handles on a 12 oz body, for example.
Step 4: Decide on Printing
Printing is usually the last thing discussed but the first thing noticed when the bag arrives. Here’s how each method performs on canvas, from the production floor perspective:
Screen printing is the most common method for canvas tote bags, and for good reason. It delivers vibrant, opaque colors on cotton canvas, handles fine details well at 8 oz and above, and the per-unit cost drops significantly with volume. The limitation is color count — each color requires a separate screen and setup charge. A one-color print on 1,000 bags might cost 0.30–0.50perbag.Afour−colorprintcouldbe1.00+ per bag. We always ask clients to consolidate their design to as few colors as possible if budget matters.
Digital printing (DTG) works for photographic designs and multi-color artwork where screen printing setup costs would be prohibitive. The per-unit cost is higher than bulk screen printing, but there are no screen fees. DTG works best on smooth, 10–12 oz cotton canvas. On textured or heavy canvas, the print head can’t get close enough to the fabric for clean ink deposition.
Heat transfer is a middle-ground option. It handles full-color designs at a lower per-unit cost than DTG, but the transfer can crack or peel over time with washing and folding. We generally recommend heat transfer for promotional bags with a short expected lifespan, not for retail products.
Embroidery adds texture and perceived value, but it’s the most expensive option per impression. A simple 2-inch logo might add $0.80–1.20 per bag. Embroidery also requires at least 10 oz canvas — thinner fabric puckers around dense stitching.
One piece of advice we give every client: print on the actual fabric you’re ordering. We’ve seen beautiful screen prints approved on a smooth 10 oz sample, then the client switches to a textured 14 oz duck canvas for bulk production — the same design, same ink, completely different result.
Step 5: Labels, Tags, and Branding Details
These small elements make a big difference in how the finished bag presents — and each one has a minimum order quantity.
Woven labels (damask or satin) sewn into the bag interior or handle attachment point are the most premium option. They’re custom-made with your logo and typically require a minimum of 1,000–2,000 pieces per design. Lead time for label production adds about 7–10 days to the order.
Printed care labels are cheaper and faster. We can produce these in-house with basic material and washing instructions. Required for bags sold at retail in most markets.
Heat-transfer labels printed directly onto the bag interior eliminate the sewing step. They’re cost-effective for large runs but can wear off with repeated washing.
Hangtags are separate from the bag construction but complete the retail presentation. We can source custom hangtags with your branding, but they add a per-unit cost and a manual attachment step that increases labor.
Custom packaging — individual poly bags with branded stickers, custom-printed shipping cartons, tissue paper wraps — is the final layer. Most clients start with basic bulk packaging and add custom presentation as their brand grows.
Step 6: The Sampling Process
This is where expectations meet reality. Here’s how sampling works in our factory:
Digital proof (1–2 days): We create a technical drawing of your bag with all dimensions, materials, and print placement marked. This costs nothing. Review it carefully — once you approve, these specifications become the production standard.
Pre-production sample (7–10 days): One physical bag made to your exact specifications. This is not a free sample; we charge the sample fee plus shipping, and the fee is typically credited against your bulk order. The pre-production sample is your last chance to change anything without cost.
Production sample (during bulk run): Once mass production starts, we pull one finished bag from the first batch and photograph it. This confirms that the production line is executing the approved pre-production sample correctly. Any deviation at this stage means stopping the line.
The most common sampling mistake we see: clients approve a pre-production sample, then request small changes — “can the handle be an inch longer?” — after mass production has started. At that point, the fabric is already cut. Changes mean scrapping cut pieces and restarting. This is how delivery dates slip and costs escalate.
Step 7: Production Timeline
A typical custom canvas tote bag order follows this timeline:
Total: 6–9 weeks from first inquiry to delivery for a standard ocean-freight order. Rush orders with air freight can compress this to 3–4 weeks, but the freight cost typically exceeds the bag cost.
Common Customization Questions We Get
Can I mix different bag sizes in one order?
Yes, but there’s a cost implication. Each size requires its own cutting pattern, its own screen setup (if printed), and its own quality control checkpoint. The more variations in one order, the higher the per-unit labor cost. We generally recommend no more than two size variants in a single order under 5,000 units.
What if I only need 500 bags? Can you still customize?
It depends on the degree of customization. If you’re choosing from our standard sizes, stock fabrics, and adding a one-color print, 500 units is workable. If you need custom dimensions, custom-dyed fabric, and multi-color printing, the setup costs get spread across too few units to make economic sense. Our general guideline: the more custom your bag, the higher the MOQ needs to be for the per-unit price to stay reasonable.
Do I need to provide a tech pack?
No, but it helps immensely. A tech pack — a document specifying dimensions, materials, stitching, printing placement, and tolerances — removes ambiguity. If you don’t have one, we can work from a reference bag, a sketch, or even a detailed description. But the more precise you are upfront, the fewer rounds of sampling you’ll need.
Can you match a specific Pantone color for the bag fabric?
Yes, for dyed canvas. Fabric dyeing is more forgiving than printing — close matches are achievable. But be aware that cotton takes dye differently than polyester blends, and the same Pantone spec will look slightly different on 100% cotton vs. a poly-cotton blend. We always recommend approving a dyed swatch before committing to bulk production.
What Makes a Custom Order Run Smoothly
After processing thousands of custom orders, the ones that go perfectly have these things in common:
- One decision-maker. When three people from the client’s side are emailing different specs, something gets lost. Consolidate communication through one point of contact.
- A reference bag. Even if it’s not the right size, color, or fabric, a physical bag gives the factory a tactile reference point. “Like this, but bigger, in cotton, with longer handles” is clearer than any written description.
- Realistic timeline expectations. A 12-container order of 50,000 bags cannot be turned around in two weeks. We can compress timelines, but compression costs money and increases quality risk.
- Trust in the sampling process. The clients who skip sampling to save time are the ones who end up disappointed. The clients who work through two rounds of sampling are the ones who reorder.
Getting Started
Customizing canvas tote bags is not complicated, but it rewards attention to detail. The brands that get the best results are not necessarily the ones with the biggest budgets — they’re the ones who communicate clearly, understand the production process, and respect the timeline.
If you’re ready to start your custom canvas tote bag project, reach out with your basic requirements: approximate size, quantity, fabric preference, and printing idea. We’ll send you a spec sheet to fill out and walk you through the next steps from there.

 English
 French
 German
 Japanese
 Arabic
 Thai
 Vietnamese
 Russian
 Spanish
 Portuguese